Monday, April 25, 2011

Just When You Thought it Couldn't Get Any Wierder, there's Kombucha

I've been making this nectar of the god's for about a year now. It's such a great alternative to soda, and I enjoy being able to drink more than just water.

It's a fermented organic tea. It was brought to us by the Russians, who have been making it for centuries. It contains less alcohol than NyQuil. Since it's naturally fermented, it's ALIIIIIIVE!! with good bacteria (which all of our American intestines could really use...to help with digestion, and such).

Ingredients: white sugar (which changes chemically during the fermentation), organic black tea, Kombucha "mushroom" & 1/2 cup Kombucha tea from a previous batch.


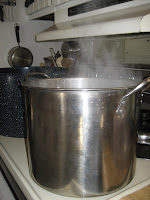
Bring water to a boil on stovetop, stir in sugar and tea. Let it completely cool (approx. 8 hours).

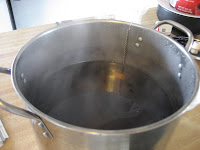
After tea has cooled, pour some reserved, already-made Kombucha tea in the bottom of your fermenting/brewing container.


Pour in your cooled tea. Now place your SCOBY ("mushroom") on top! Gotta love that slimey-ness!


Make a criss-cross with tape on the top of the jar. Place a towel over this tape. I then secure it with a large rubber-band. You want the brew to be able to breath, so mold won't develop. The tape keeps your towel from falling in your brew, and your towel keeps bugs and other contaminents out of your brew.


Place the fermenting/brewing containers in a warm place. I put mine on top of my freezer (same place I rise my bread, too). It stays nice & warm up there, even in a trailer without central heat in winter. In the winter, it takes 7-8 days. In the summer, it takes a whopping 4 days (it gets HOT in the house while we're at work)!!


After the proper time, you're ready to bottle! If you're using the Continuous Brewing Method (which is what I'm using now), you just skim off the top or pour out the spout how much you want to drink and simply pour back that same amount of fresh sweet tea (http://westonaprice.org/food-features/1742-continuous-brewing-kombucha).


Remove the mushroom, reserve 1/4 cup fermented brew for your next batch, stir & pour into clean bottles. It's almost time for buch!


Drink & enjoy!!

Monday, January 17, 2011

This Little Piggy Went to the Freezer


Last Saturday, our friend & neighbor, Craig Biggers decided it was time to butcher one of his 2 Red Wattle pigs, "Beans" ("Pork" needs to get a little fatter, so he's safe for now).


Since Aaron and I would eventually like to have 1-2 pigs of our own, we asked if we could help.
Craig graciously let us tag along and help out in anyway we knew possible...which was limited.
The following pictures are for those interested in seeing all that goes into getting a small-farm hog onto your plates...BEWARE!!!!! THESE ARE GRAPHIC, so stop now if you have a weak stomach (on the right side of the screen, click on "Christmas 2010" to skip ahead)!
To everyone else, enjoy!


When H.W. was a little boy in Arkansas, his family would get up very early on hog-killing days. He'd be very hungry after a few hours, so his mother would let him have the "melt" out of the hog. I'm not sure what this is: I think it was right next to the stomach?

So, reliving his youth, H.W. cooked it over an open fire. It tasted kind of like bologna...after a generous sprinkling of salt!


Cutting the skin into cubes in order to render the lard. Heating the cubes separates the fat from the skin. The skin that's left over is called "cracklins" and can be put into cornbread batter to make "Cracklin Cornbread." The cracklins can also be reheated in the oven to make pork rinds--probably much better than you can buy at the gas station...and with no other preservatives besides salt!


My camera battery died, so I didn't get pictures of us grinding the lesser cuts into breakfast sausage.
**It was a fun & educational day, utilizing the old self-sufficient skills that have kept humans alive for centuries!